Create a Map
This article will show you how to create a map that will be shareable with other users.
Note: We assume all the initial steps have been done such as the configuration of the map object by the Salesforce admin.
In this article
The main entry point for an end user is the Galigeo Tab. In this tab, a user manage (create/edit/delete) his owned map(s).
What is a Map?
A Map is a set of Map Objects and analytics defined by the application administrator. The user can choose between those objects to build his own map and can see them.
Creating a Map
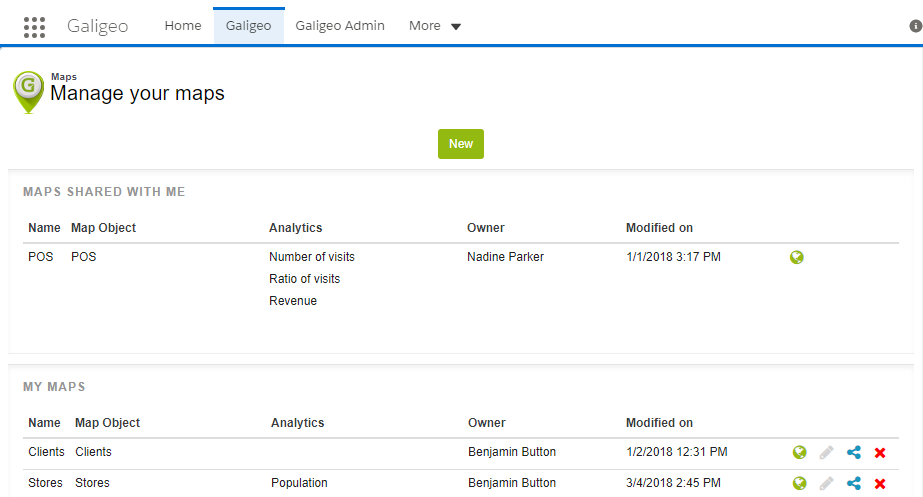
When running the app for the first time, the content of the Galigeo tab is composed of a section with an empty list of maps.

Click on the “New” button to go to the Visual Dataset creation page.
The creation page is divided in three parts:
-
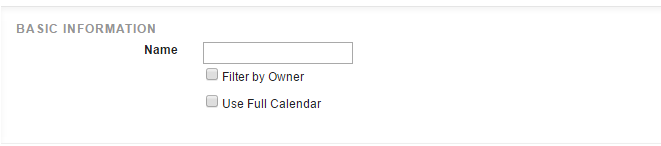
Basic information section: user is invited to give a name to its Map and select if he wants to see all of the records or only those for whom he is the owner.
The “Use Full Calendar” option allows to the user to manager events with a week view of the calendar. This feature will be explained further in Visit planning.
-
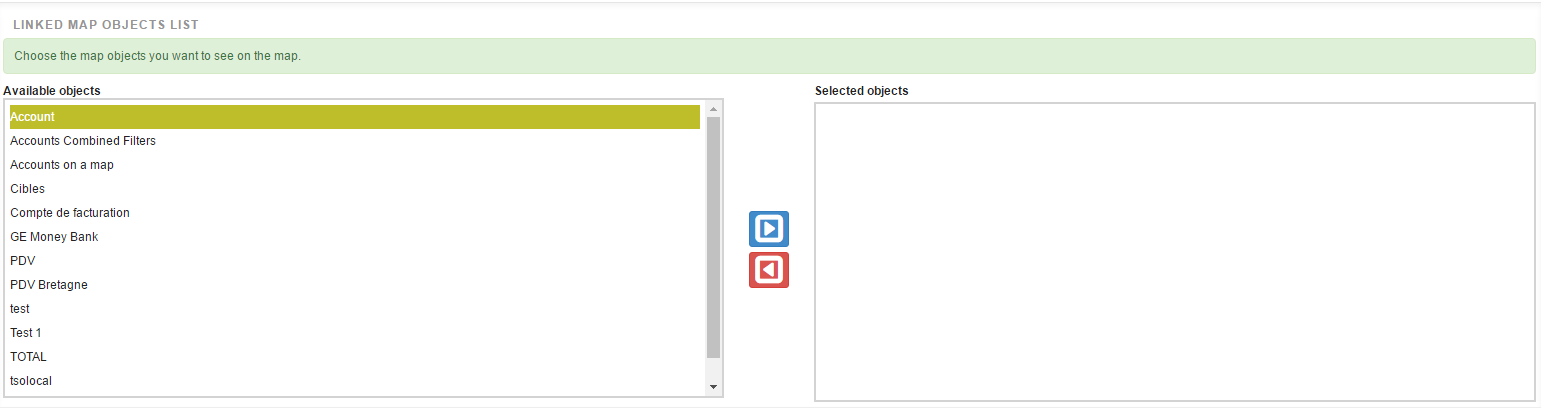
Linked Map Objects list section: user selects from the map objects list what he wants to add to the current Visual Dataset
-
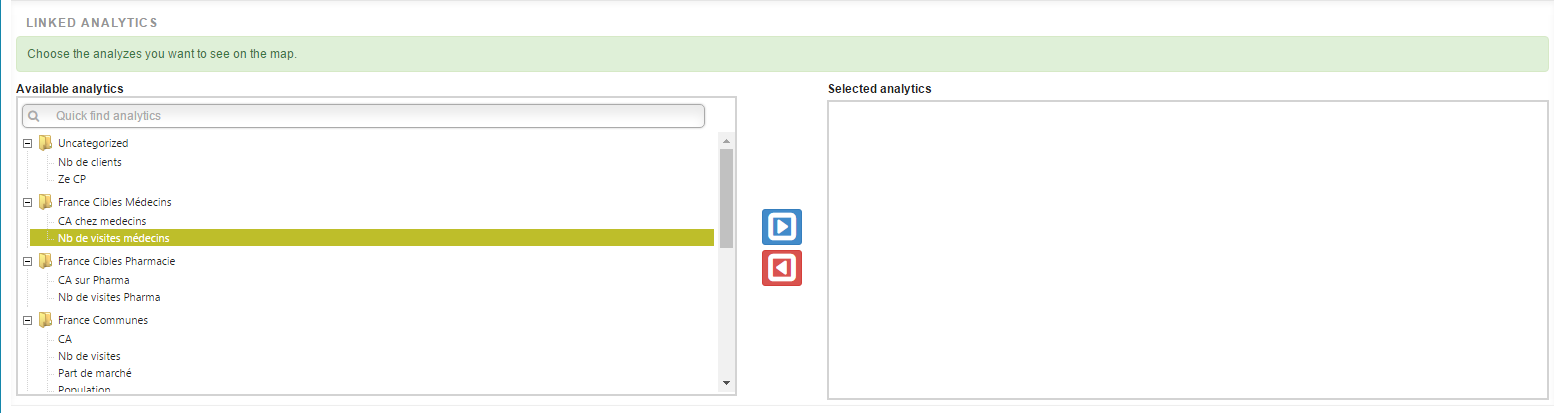
Linked analytics section: user selects from the list of analytics defined by the application administrator what he want to add to the current Visual Dataset
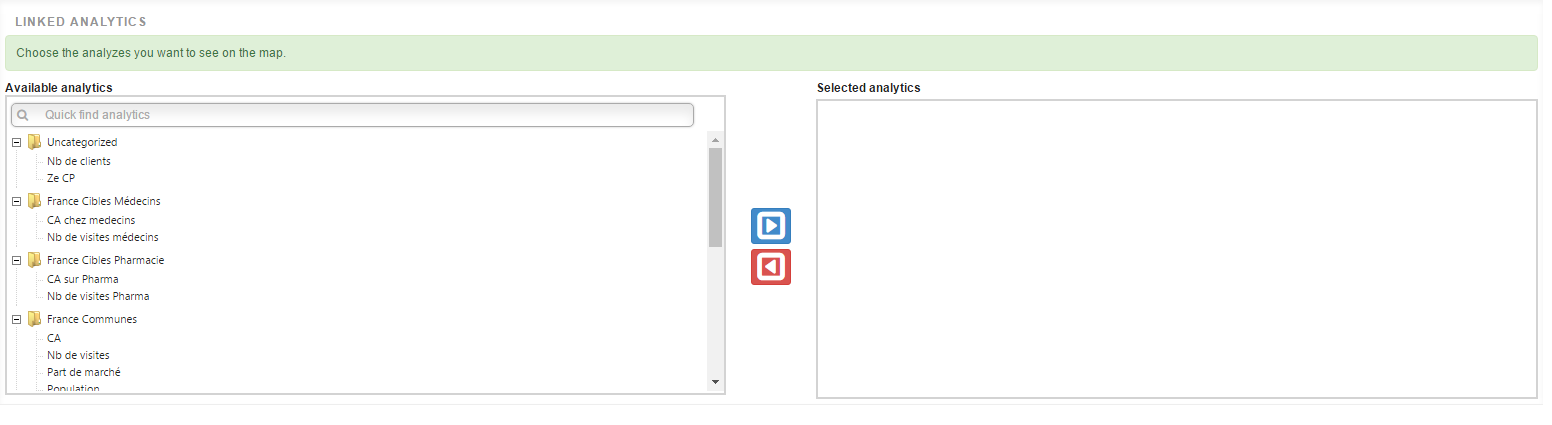
Available analytics are categorized. A quick find input field allows to filter the list of analytics for an easier lookup.
For both Map Object section and Analytics section, the selection is as following:
-
Select a list of object user wants to add
-
Click on the
 icon
icon -
Result
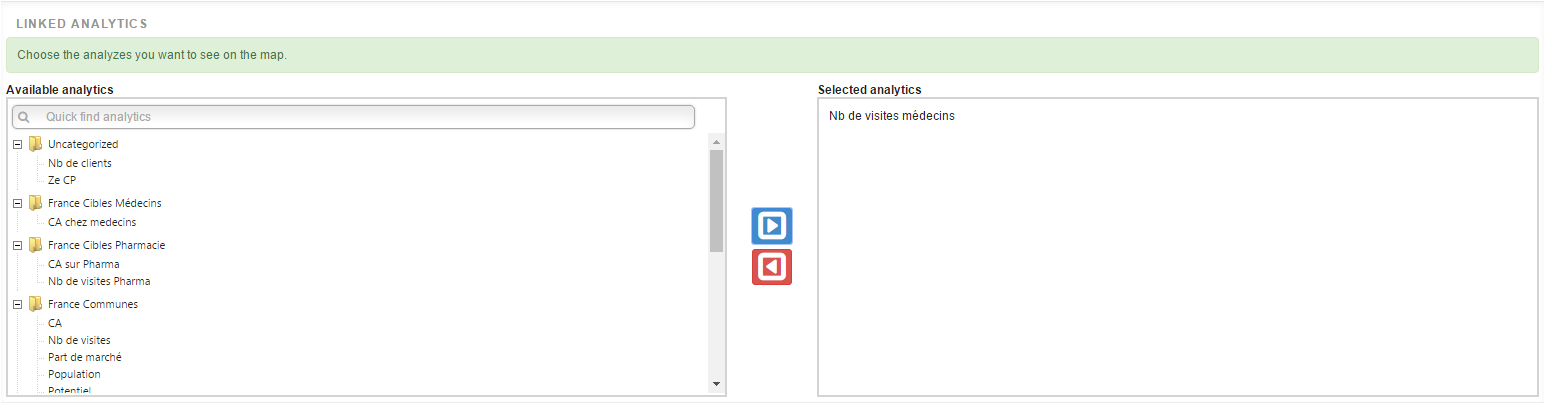
Removing objects is following the same workflow. Select objects on the right part and then click on the  icon
icon
Once the user has selected his objects, click on the “Save” button.

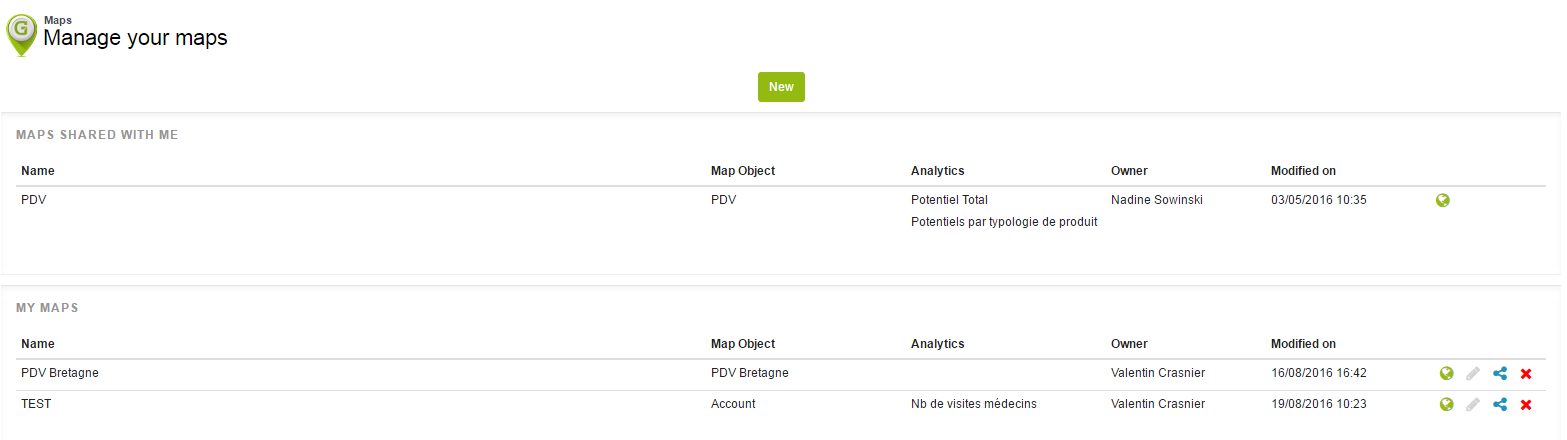
Back to the Visual Dataset page, the newly created one is now available in the table with the following columns:
- Actions :
 : click on it to edit the Visual Dataset
 : Share it
 : click on it to delete it.
 : Go to the map
- Map Objects: The list of the map objects linked to the Visual Dataset
- Analytics: The list of the analytics linked to the Map
- Owner: see the owner’s name
Share a map
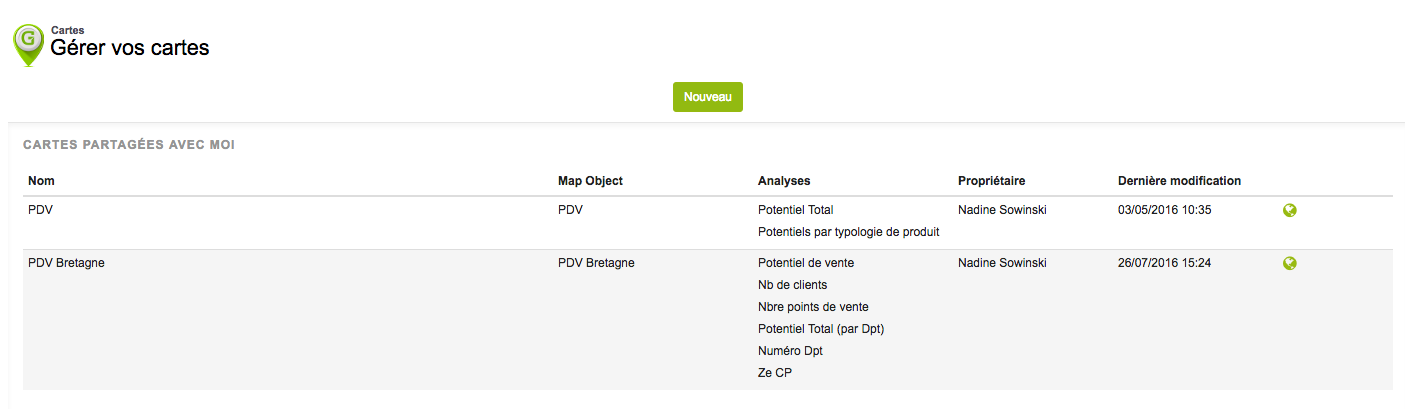
The first page in the Galigeo tab displays the maps you have access to in 2 sections:
- Maps shared with me
- My maps
You’ll find below the steps to complete in order to share a map with one or more users:
 Step 1: Click the icon
On the share screen, click the “Add” button.

Step 2: Select the users you want to share with
You can add users:
- By role: allows to add several users at a time. Roles correspond to what has been defined in the Salesforce role hierarchy.
- By user: Select one or several names of users who should be able to access the map
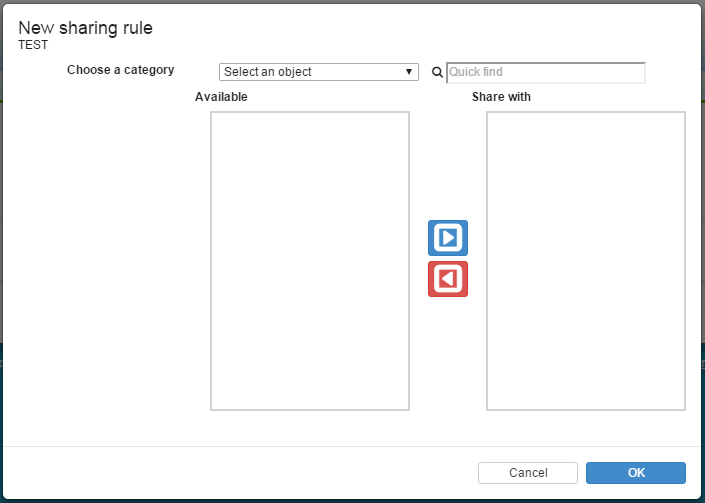
You can filter the list of roles or users thanks to the search field located to the right. To add an element to the list on the right, click a role or a user and then click . You are good to go, confirm by clicking on OK.
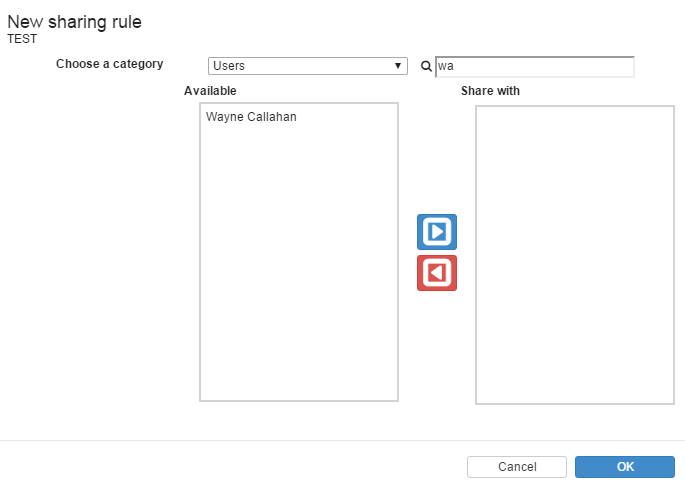
The map has been shared and the recipient(s) can access it from the “Maps shared with me” section.
 |
The recipient of a shared map can access it but cannot edit nor delete it. |