Geocoding on mobile
This article describes the features of the geocoding component for the mobile app (formerly Salesforce1 or SF1).
In this article
Nearby search
Depending on the setup of the geocoding component and if the Salesforce application is made available, a user can access an application that displays a list of POS within a perimeter.
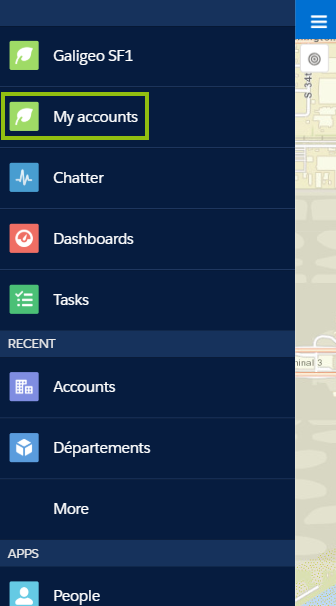
Let suppose we are a user with access to Salesforce and that an application named “My Accounts” has been set up. The user would have in his menu Salesforce:
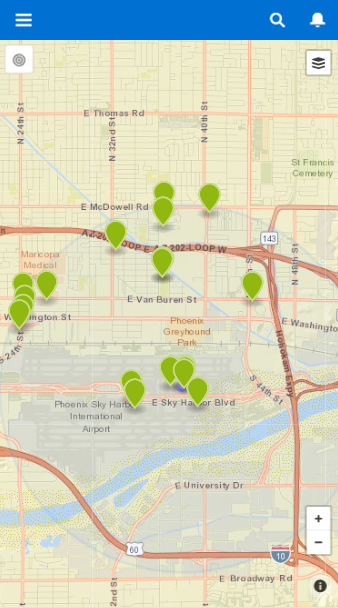
When the application is launched, the user is geolocated and a search for nearby POS is automatically started with default settings of the component made by the Salesforce administrator. The current position of the user is marked by a blue circle. The result is displayed on the map.

Clicking on the ![]() button displays the list of search results and the search distance. The settings are the same as those for the desktop version.
It is possible to change the distance and restart a search.
button displays the list of search results and the search distance. The settings are the same as those for the desktop version.
It is possible to change the distance and restart a search.
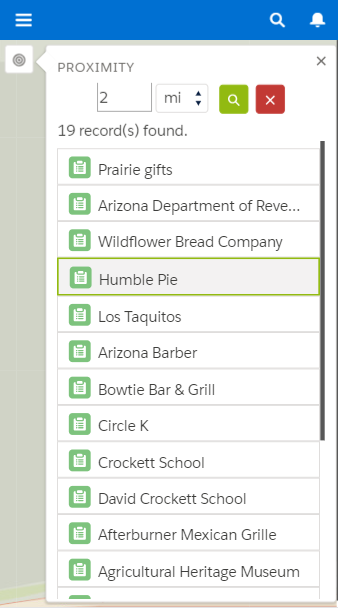
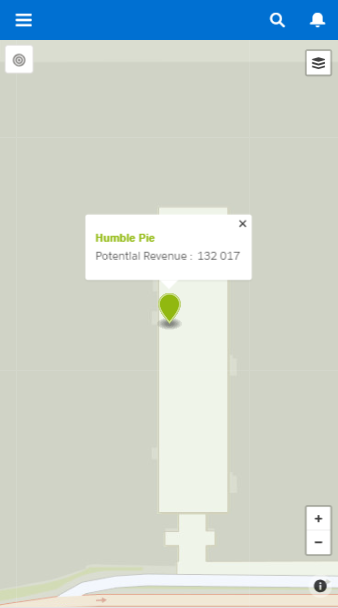
Clicking on an element of the list or an object on the map allows you to select this object and display its infowindow. By clicking on the name of the object in the infowindow, you can view its SF1 page.
Geocoding
Geocoding a POS in Salesforce1 is accessible from a quick action from the presentation page by clicking on the ![]() icon (the icon may be different depending on the configuration).
icon (the icon may be different depending on the configuration).
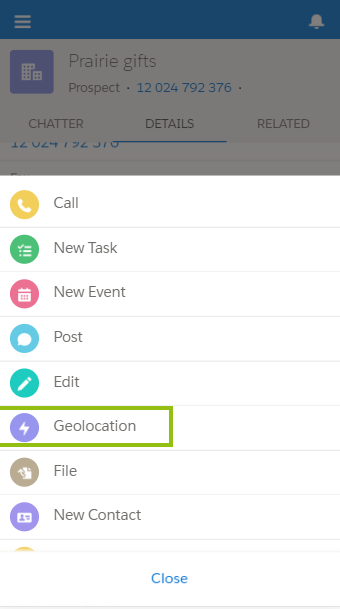
Geocoding from an address
Since the Salesforce1 app is intended for use on a mobile device, when the user starts the geocoding component, his current location is marked with a blue circle. The area above the map shows the address information for the current POS.
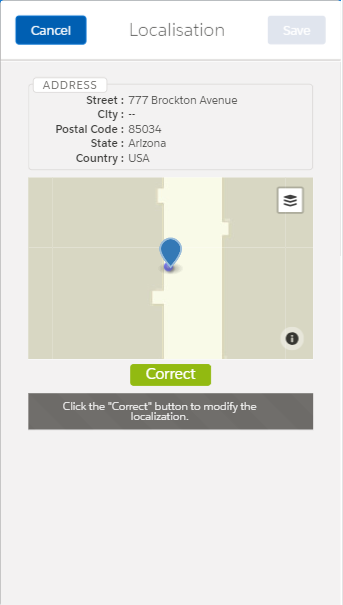
The user can start the geocoding by clicking on the “Geocode” button.
The component seeks to locate the object from the existing address. Three cases arise:
- The geocoding does not find the address: the user is asked to correct the information
- The geocoding finds an address: the map is automatically positioned on the found address and the fields of the normalized address are filled
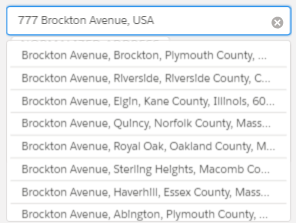
- Several addresses are found: they are displayed in a list of candidate addresses to let the user choose the one that suits him.
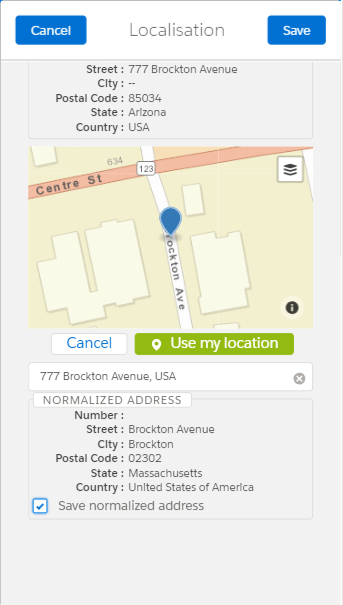
A found address
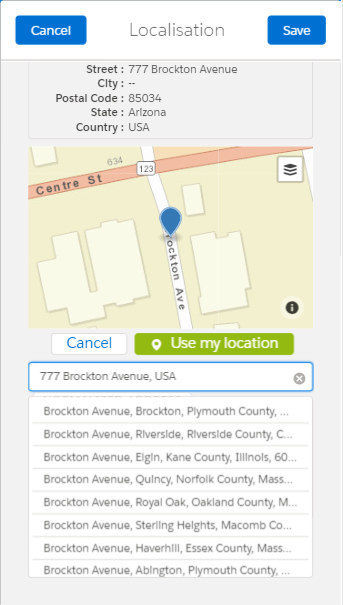
Multiple possible addresses
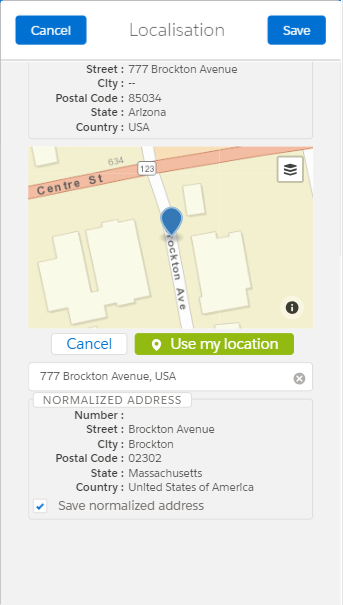
When a candidate address is chosen by the user, a marker is added to the map and the map is centered on that position. The values of the normalized address are then automatically filled in.
The user can correct the position at any time by moving the marker on the map. Inverted geocoding then makes it possible to obtain the address.
A text input allows the user to search for an address. If several addresses are candidates, they are displayed in a list to allow the user to choose the one that suits him.
Once an address is chosen, the map is positioned at the coordinates of the address and the fields of the normalized address are filled.
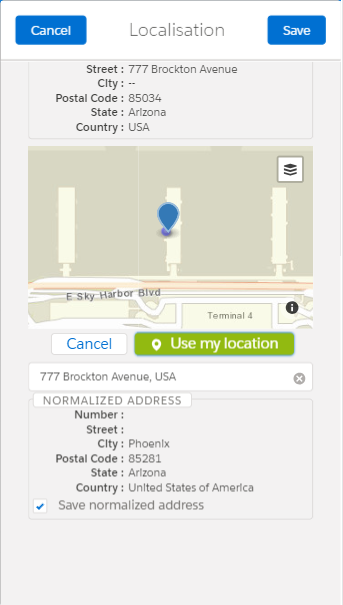
Geocoding from my position
By clicking on the “Use my location” button, the current position of the user is used to find the address and the address fields are automatically filled in.
Manual position change
Accessing to the manual position change is the same as for geolocating a POS, i.e. from the set up quick action. With the difference that this time, the user clicks the “Correct” button to apply the change.
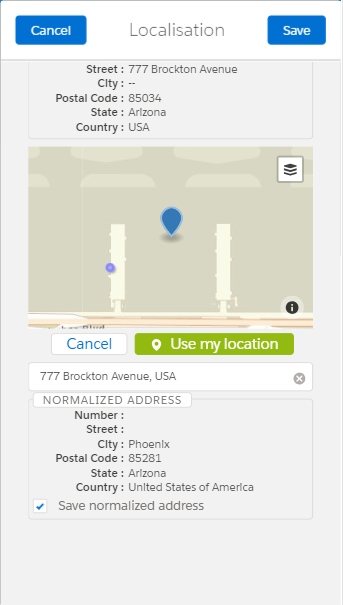
In order to correct the position of the POS, the user can:
- Move the marker on the map to correct the position and get the information from the normalized address.
- Manually enter an address
- Use his current position by clicking on the “Use my location” button
For each of these actions, the normalized address information is updated.
Saving information
Depending on the rights he has on the Salesforce object and its fields, the user can choose to save the normalized address by checking the “Save the normalized address” box.
By clicking on the “Save” button the user validates the POS position. Geographic coordinates (latitude and longitude) are automatically taken into account. Only the choice to save the normalized address is left to the discretion of the user. If there are no issues saving, the user is returned to the presentation page of the POS.
By clicking on the “Cancel” button, the user returns to the POS presentation page.