Integration and configuration of the geocoding components
 |
No support provided for this free app. |
In this article
- Integration into the page layout of an Account
- Advanced configuration by creating Visualforce pages
- Technical notes
We will integrate the geocoding component to the page layout of an Account, Contact or Lead.
5 components have been preconfigured based on Salesforce standard addresses of objects:
| Object | Address | VisualForce page |
|---|---|---|
| Account | BillingAddress | GeocodeAccountBilling |
| Account | ShippingAddress | GeocodeAccountShipping |
| Contact | MailingAddress | GeocodeContactMailingAddress |
| Contact | OtherAddress | GeocodeContactOtherAddress |
| Lead | Address | GeocodeLeadAddress |
Integration into the page layout of an Account
We will use the billing address of an account to geocode it and display a map on the layout page. We will integrate the GeocodeAccountBilling page by following the steps below:
-
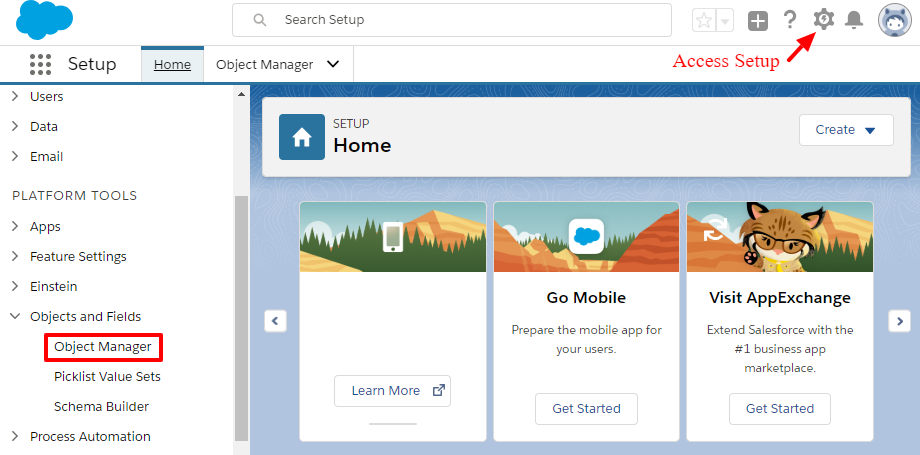
Go to Setup > Objects and Fields > Object Manager > Account > Page layouts (Salesforce Lightning)
-
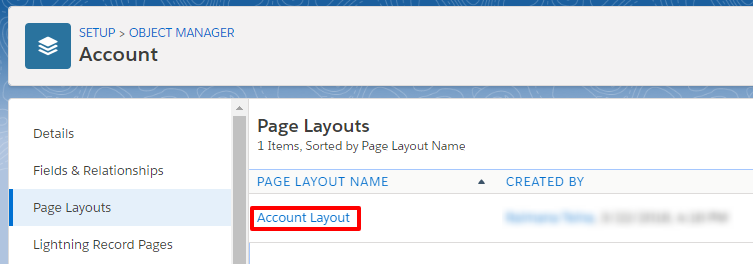
In the “Page layouts” section, click on “Edit” in front of the desired layout.
-
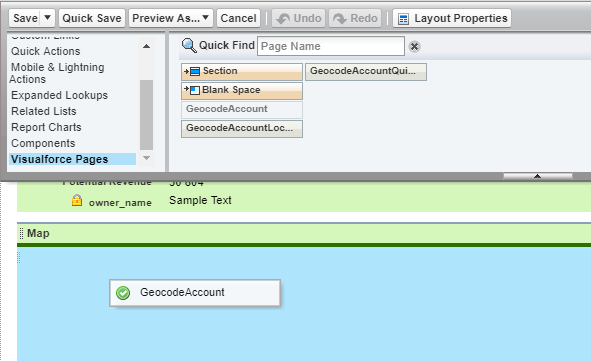
In the layout editing page, click on “Visualforce Pages”, insert a section that we will name “Map”, displayed on 1 column. Insert a “GeocodeAccount” page in this new section.
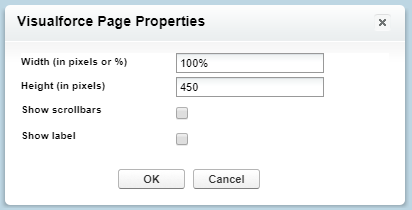
For a nicer display of the component, change its size and give it a height of 450px (double-click on the blue area or click on the Properties icon on the right).
-
Click on the “Save” button to save the modifications of the page layout of objects of the Account type.
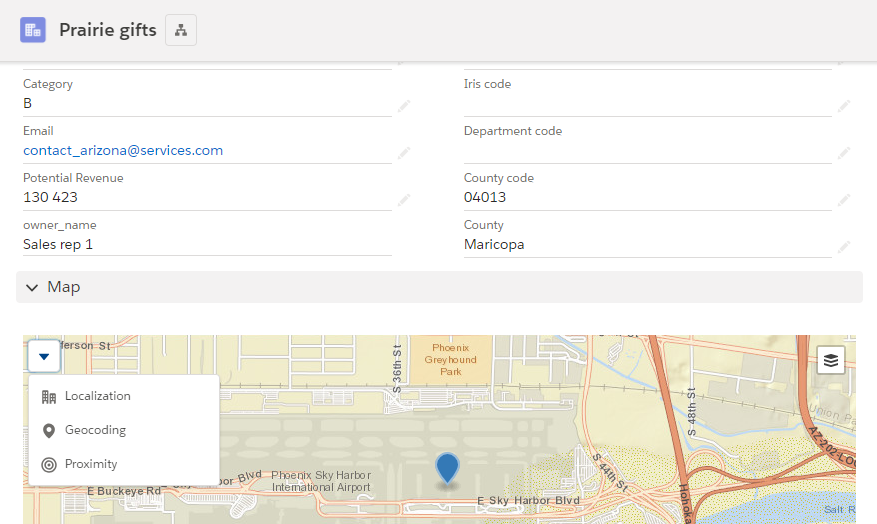
You will now see a map in the page layout of an Account for example, in a section named “Map”:
Advanced configuration by creating Visualforce pages
You can customize the components before integrating them into a page.
geoloc__c.We will create a Visualforce page which integrates the GeocodeComponent component.
- Go to Setup > Platform tools > Visualforce Pages (Salesforce Lightning) or Setup > Develop > Pages (Salesforce Classic)
- Click on the “New” button to create a new page
- In the label input, enter the value “GeocodeAccount”
-
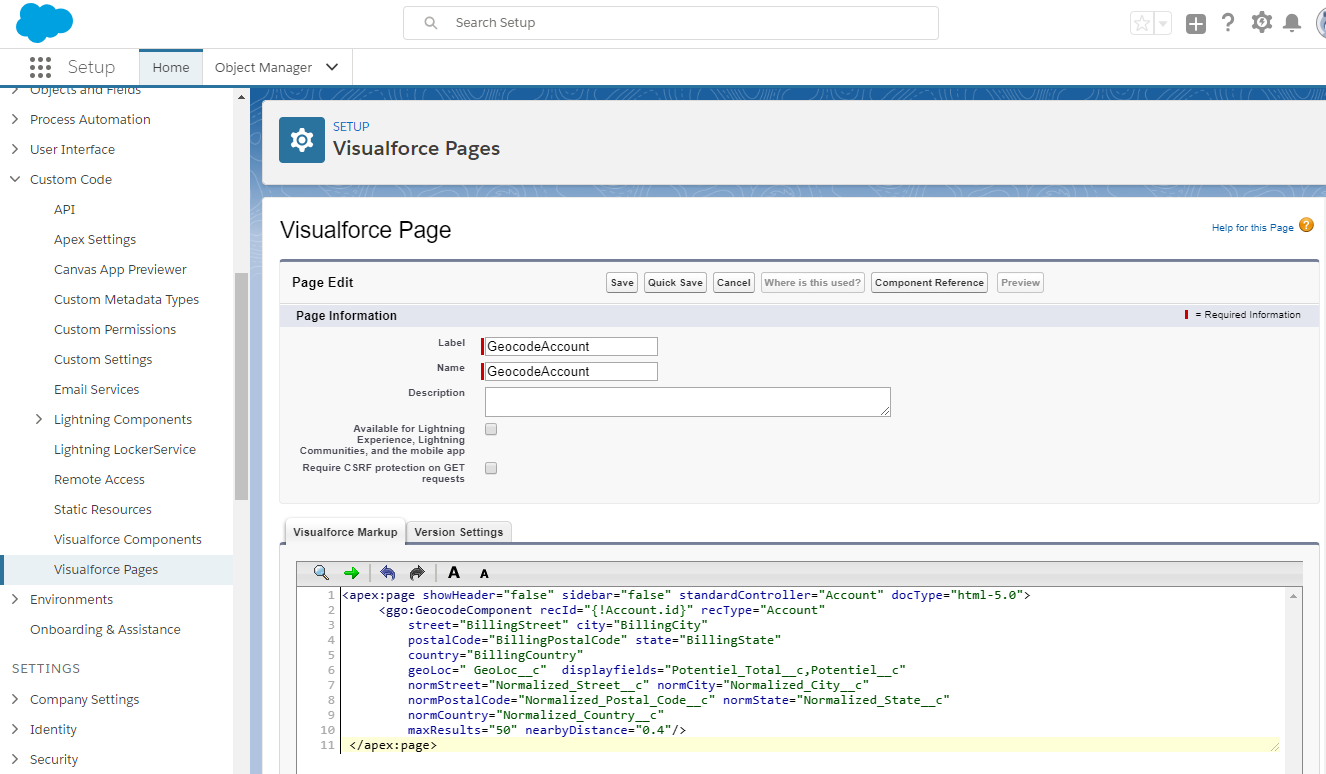
In the Visualforce markup input area, copy-paste the following code:
 <apex:page showHeader="false" sidebar="false" standardController="Account" docType="html-5.0">
     <ggo:GeocodeComponent recId="{!Account.id}" recType="Account"
         street="BillingStreet" city="BillingCity"
         postalCode="BillingPostalCode" state="BillingState"
         country="BillingCountry"
         geoLoc="GeoLoc__c"  displayfields="Phone"
         normStreet="Normalized_Street__c" normCity="Normalized_City__c"
         normPostalCode="Normalized_Postal_Code__c" normState="Normalized_State__c"
         normCountry="Normalized_Country__c"
         maxResults="50" nearbyDistance="0.4"/>
 </apex:page>
In order for the page to be integrated into the page layout of an Account object, the standard controller of this page has to be "Account".
It is important to enter the fields API names and not their labels. -
Click on the “Save” button to save the page.
Technical notes
The Account object has the following subset of fields:
| Label | API name | Type | Information |
|---|---|---|---|
| Address | BillingStreet | Text | Address |
| Postal Code | BillingPostalCode | Text | Address |
| City | BillingCity | Text | Address |
| State | BillingState | Text | Address |
| Country | BillingCountry | Text | Address |
| Street (Normalized) | Normalized_Street__c | Text | Normalized address |
| Postal Code (Normalized) | Normalized_Postal_Code__c | Text | Normalized address |
| City (Normalized) | Normalized_City__c | Text | Normalized address |
| State (Normalized) | Normalized_State__c | Text | Normalized address |
| Country (Normalized) | Normalized_Country__c | Text | Normalized address |
| geoloc | geoloc__c | Geolocation | latitude/longitude |
The Visualforce GeocodeComponent component has the following attributes:
| Attributes | Required | Information | |
|---|---|---|---|
| recId | Yes | Salesforce object id | Address attributes |
| recType | Yes | Salesforce object type | Address attributes |
| standardAddress | Standard Address field to use (for Account, Contact and Lead) | Attributs d’adresse | |
| saveNormalizedAddress | Saving normalized address (default = true) | Attributs d’adresse | |
| street | Address field where the street is, required if standardAddress not filled in | Address attributes | |
| city | Address field where the city is, required if standardAddress not filled in | Address attributes | |
| postalCode | Address field where the postal code is, required if standardAddress not filled in | Address attributes | |
| state | Address field where the state (or region) is, required if standardAddress not filled in | Address attributes | |
| country | Address field where the country is, required if standardAddress not filled in | Address attributes | |
| geoLoc | Field containing the coordinates, if filled in replace standardAddress location field | ||
| normStreet | Field where the street will be saved | Normalized address attributes | |
| normCity | Field where the city will be saved | Normalized address attributes | |
| normPostalCode | Field where the postal code will be saved | Normalized address attributes | |
| normState | Field where the state (or region) will be saved | Normalized address attributes | |
| normCountry | Field where the country will be saved | Normalized address attributes | |
| displayFields | List of fields to display in the infowindow | Visualization | |
| maxResults | Maximum number of results when searching by proximity. The value is 10 by default. | Visualization | |
| nearbyDistance | Default distance of proximity search. The value is 10 by default. | Visualization |
You have to add attributes that define an address, even with empty strings. However the value of the “street” attribute needs to match at least one existing field of the object. If not, an error message will inform the user to check the configuration of the component. The values of the fields of the object corresponding to these attributes are used to perform the geocoding.
The attributes of what we call the nomalized address are used to save the address coming from the geocoder. It is of course possible that the values of these attributes are the same as those used for the address.
The list of fields of the “displayFields” attribute is used to display the values in the infowindow when the user clicks on a map marker.
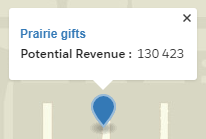
Infowindow of the current object
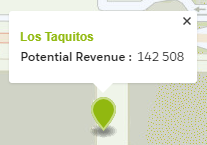
Infowindow of another object